Buried in the northern woods of central New York State, there is an independent hobby store that is about to make a bit of a buzz in the racing quadcopter marketplace!
MexAir R/C is located about 45 minutes north of Syracuse in the small town of Mexico, NY. Up to this point, Mexico, NY has generally been noted for the amount of snowfall it receives every winter given that it is pretty much in the center of the bulls eye for the major ‘Lake Effect’ snowstorms that come down upon this region each winter from Lake Ontario. Marty and Josh Chipkin, the proprietors of MexAir R/C, are committed to putting Mexico on the map for something other than large snowfall totals.
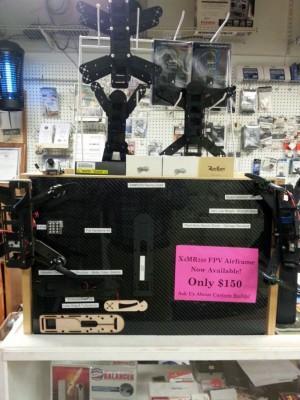
I first heard of MexAir R/C about the same time I re-entered the hobby almost 3 years ago, but I never had a chance to check them out. Then, at the annual STARS (Syracuse Thunderbirds Aero Radio Society) airshow this past September, I ran into them at the vendor booth they had set up.
What caught my eye at the time was a quadcopter that they had on display. I am in no way an expert on quadcopters but what intrigued me about this quad were the materials and technology that went into the fabrication of the quadcopter. I soon learned that it was designed, manufactured and sold by Marty and Josh. We exchanged information and I committed to visiting their new hobby store located in Mexico. Last month, I finally managed to follow up on that commitment.
What follows is an article by Marty and Josh that resulted from that visit. Given that MexAir R/C may be a bit off the beaten path for some (especially in the winter!), I understood that it may be hard for a small, local business like MexAir R/C to reach a larger audience and get the word out with information about their quad. I am a huge supporter of small businesses, especially those that can display the ‘Made in the USA‘ label on their products, so I offered up FlyBoyz as a vehicle to help get that word out and I am glad that they accepted the offer.
So, with all that being said, I’ll let Marty and Josh describe their racing quadcopter. Be sure to check out the video posted at the end of their article and be sure to check out the links to MexAir R/C that are provided in their article!
X4MR250 Racing Quadcopter
Designed and Manufactured by MexAir R/C
Hey folks,
Marty and Josh here from MexAir R/C in Mexico, NY. We have been in business at our current location for almost 2 years but, we have been in the hobby business for about 10 years now. Combined we have over 50 years of hobby experience. We typically deal with your airplanes, helicopters, rockets, quadcopters, ARFs, BNFs and most main stream products you might find on Tower Hobbies or Horizon Hobby. We have recently been getting into the Do-it-yourself First-Person-View racing quads and have been having a ton of fun with it. With all that said, we are very happy to give you all as much information as we can squeeze into one article on our new Racing Quadcopter, available now for purchase at www.mexairrc.com.
We are extremely excited to announce our brand new product, the X4MR250 Racing Quadcopter. We have been working on this project for about a year now and we are finally able to make our new product available to you!
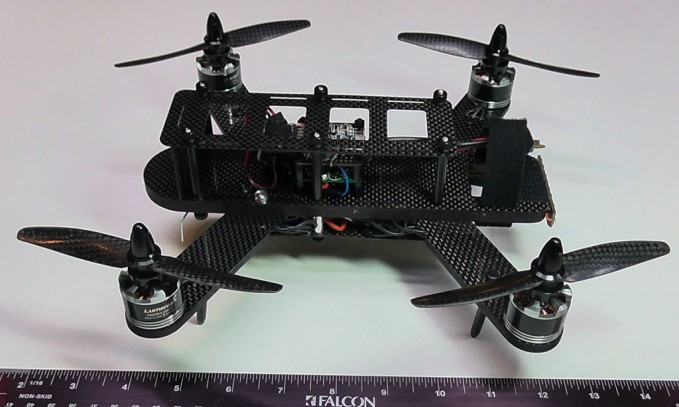
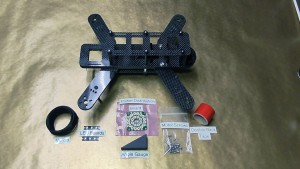
We began our design by looking at the features of other 250-class quads on the market, including the popular QAV250. We saw that most designs that are out there are very simple, one piece bases with multiple levels. We also saw that most quads out there have “lightening holes” in the arms and main frame. Naturally, most other quads out there are solid carbon fiber, solid plastic, or fiberglass / carbon-fiber composites.
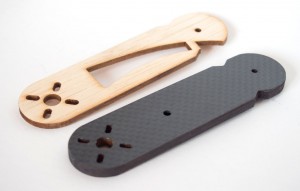
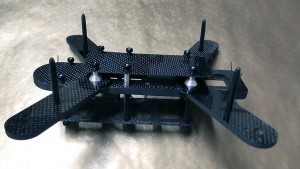
We decided that our goal would be to make the best 250 size on the market. We wanted to have the fastest, lightest, most durable, easiest to repair if needed, and most affordable 250 size quad to date. We started with some scrap carbon fiber we had laying around (1mm thick). We knew that 1mm would not make a very sturdy frame but also knew using a “Sandwich” technique with a light weight core material would make this quad extremely light and rigid at the same time. We decided to try a special core material that we found and not so much to our surprise, we found a method that worked for our entire frame. Using 1mm Carbon fiber sheets for the top and bottom with our core material sandwiched between, we were unable to bend the material to break it by hand. We knew we had our base product at this point.
We tried several different adhesives to make the carbon fiber stick well to the core material. After a lot of testing we finally discovered a mixture of different adhesives that work perfectly to keep the materials together without adding too much weight. Though, unfortunately for the readers, this is our trade secret.
(Click on photos to zoom in on them)
We already knew that Carbon Fiber was going to be a major component to keeping our quad as durable as possible. We researched different types of carbon fiber that are available to us and decided on the quasi-isotropic aircraft grade carbon fiber, with only one gloss finished side. The unfinished side would help create some rough surface area for us to use on the inside of the quad (not visible) to attach our core material to. The quasi-isotropic material has proven to be the most durable.
The core material we chose has enough give or “squish” to it to add some shock absorption in the event of a crash and also assists with keeping the quad buttoned together, using the included hardware. The “squish” involved in the core material prevents any screws or nuts from backing out without the need for loc-tite (except on the motors, we always recommend loc-tite). The damping effect of the core material has also proven to reduce the transfer of vibration to the video equipment – reducing or eliminating the need for camera vibration dampers.
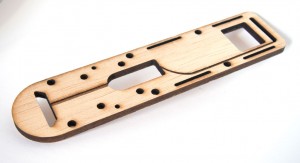
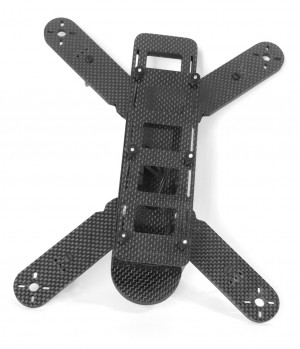
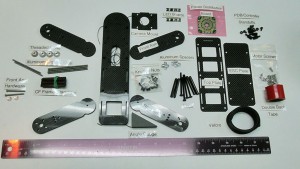
Since we were using a 3-layer frame, we decided to do something no one else has done yet. We chose to cut out hidden channels in the core material to run your motor wires to your ESCs straight through the middle of the arm! You no longer have to have all those ugly wires hanging all over your arm with zip-ties holding them in place. The channels run the wire straight from the motor, through the arm, and then inside to the frame where your speed controls are located. This creates a cleaner looking arm that also eliminates some resistance you would see in flight with other quads on the market.
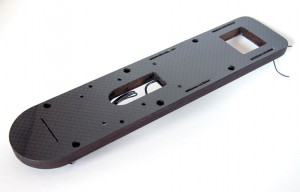
We also have hidden channels cut through the main frame for your LED lights in the front and back (also included in the kit, 2 different color LED strips). These channels are pre-wired and ready for LED installation. The wires are completely hidden and make the LEDs look like they are just a part of the frame itself.
Due to the fact that our frame is so lightweight, we did not see the need to cut “lightening holes” in the arms or most of the main frame. This adds to the durability of the arms and frame and also creates less resistance during flight which makes the quad faster. Think about it, would you prefer a smooth surface for the air to run across or would you prefer something that has all these holes in it that create more flat surfaces for the wind to slap up against during flight? Personally, we thought the more streamlined and cleaner looking version would be best to get the most speed out of our product and it has proven itself to work.
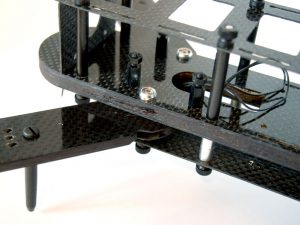
We continued to look at other quads for comparison and we knew how frustrating it would be if someone were to snap an arm off during a crash with these solid frames that are out there. You would end up buying a whole new frame for another $150! We know there is no easy way to repair carbon fiber. So we decided to make arms that pivot on the frame. These arms would have the ability to swing back if they hit something at high speeds, which would save your frame and the arm. You may break a blade, but you should expect that with any quad you fly and crash.
I bet you’re saying to yourself right now, “Well, carbon fiber is not supposed to break, is it?” And you’re right, it’s not, but guess what? It does! Especially when you’re flying 55-60mph, and have all the extra added weight of FPV equipment and big motors with a 4S LiPo system!
That’s the point, to be able to fly as fast as possible and still be able to make it out of a crash with minimal to no damage.
Also, because the arm angles are adjustable, you can adjust the arms either forward or backward to give you different flight characteristics and change the center of gravity! We include an angle gauge for your standard 60 degree set-up.
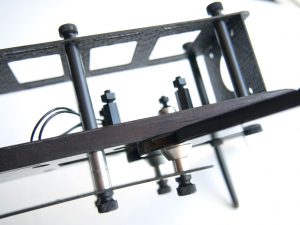
Our next step was to figure out proper placement of the electronics. It was easy to decide where the speed controls would go. We made a solid carbon fiber plate that mounts under the arms which helps hold everything together. The spacing is perfect (15mm) to install your ESCs without making it too tight and also allowing airflow to the speed controls so they do not overheat.
As for the Flight Controller and Power Distribution Board (PDB), we cut a hole in the main frame for all the wiring from the ESCs to come up from the bottom to the Power Distribution Board. On the main frame there are 6 holes, 4 of which will be used and have the appropriate 30.5mm spacing for most flight controllers and PDBs. Near the big hole in the main frame where the wires come up, you would place your “Stand-offs” for the Flight Controller and PDB, which will mount on top of each other (with plenty of space from the stand-offs) and create a very clean and organized look for your quad.
Now, the reason there are 6 holes instead of just 4 to mount your Flight Controller and PDB is because of the different choices in electronics and batteries that are out there. If you use the 4 holes closest to the front, this allows you to fit a 3S 2200mAh LiPo battery for general sport flying and more flight time. This still leaves you enough room for an FPV Camera in the front. The only problem here is, if you plan on using a full size receiver it may be a tight fit (Note: you can always mount the receiver on the top or bottom of the quad with no issues, though we prefer to have everything mounted inside). This is recommended for standard sport flying or racing if you have a fixed camera position with no servo controlling the camera angle.
If you were to use the back 4 holes to mount your flight controller and PDB, this gives you plenty of room for a camera in the front, a full size receiver, and a servo for changing the angle of your camera during flight. The only problem here is it would be tough to fit a 3S 2200mAh battery using this set-up. This set-up is recommended for those who will be using the smaller and lighter 3S 1350mAh or 4S 1400mAh batteries with a servo to pivot your camera, typically your standard race set-up.
Now, what if you were to crash out in the field and you forgot your tools? No problem! The X4MR250 is designed to come apart almost completely by hand. We utilize thumb screws for most of the quad frame, including the arms.
After we had figured out the basics of our frame design, we knew that we would be using our quad for First-Person-View racing. We decided to use a standard camera mount in the front of the quad. This mount can be used for any of your typical “board” cameras that have mounting holes in them. This mount also provides a huge amount of rigidity to the frame itself. We have designed the quad with enough room behind the mount itself for other style cameras that include their own specific mount. This space can be used with any of your “pivoting” cameras where you are able to adjust the angle with a servo and transmitter.
Without all of these extra features, our quad would be your typical, boring, generic 250-class racing frame. We are not okay with typical. We want to be different. We want to provide you the best quad frame for the price. We want you to have the best product on the market. We want you to be 100% successful. We want you to WIN. And most important, we want you to have FUN!
Not only are we providing you the best frame on the market for the price, we are offering you lifetime support on your product. We are not a giant corporation with 25 buttons to press on your phone before you reach a representative. We are two people who have dedicated all of our time to making a top-notch product, hand-built, with the most extreme attention to detail that a MACHINE just simply cannot provide. If you need help with your product, if you need any assistance whatsoever, we are here with answers. Please feel free to contact us at any time through our website at www.mexairrc.com, by phone 315-532-6826, or by e-mail to mchipkin@twcny.rr.com or Joshua.chipkin1@gmail.com. You can also contact us through Facebook at www.facebook.com/mexairrc.
You may also visit our website, www.mexairrc.com, to purchase your own X4MR250 Racing Quadcopter at the “Web Store” (www.mexairrc.com/apps/webstore/). Check out the “250-Class Quadcopter Racing” tab (www.mexairrc.com/250-class-quad-racing) for the detailed PDF instructions and series of videos by Marty giving you tips and hints as to how to put the Quad together.
We plan on developing our own FPV Racing Course this coming Summer (2016) which will be based right here on site in Mexico, NY. We will be carving trails through the woods and developing the land to make it the most fun FPV Racing experience you’ll ever have. We would love for you to be a part of it. Keep in touch on our website or Facebook for updates as we go.
To close, we thank you all for reading our article. We appreciate all of the support the R/C community has given us. We would also like to thank FlyBoyz for publishing our article and getting the word out there.
Please remember to be safe, always check your surroundings before you take off and have fun!
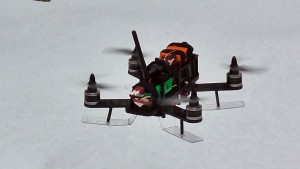
X4MR250 Test Flight #1


