This post is going to be a little different than my normal fare in that I am going to attempt to do a product review.
As I reported back in August, my Sterling Mustang had a bit of a run-in with Terra Firma – or with Adolf Galland if you listen to my control line flying buddy, FlyBoy Steve Dwyer. This run-in left it in need of a major rebuild. I knew that with my recent housing move still being a large consumer of my free time, I would not be able to address the rebuild until most likely the winter. That left me with nothing to fly for the remainder of this flying season. And so I decided to go the ARF (Almost Ready to Fly) route.
As I’ve described here in prior posts, I enjoy building models probably more than I do actually flying them. And when I do fly something, I really take great pleasure in watching my ‘creation’ take to the air. So to me, the idea of assembling some components and then tossing them into the air just loses something in the translation. With an ARF, there is no real ‘building’ to take pleasure in and there is no real pride in watching my creation take to the sky. However, when the goal is to have something to fly, and the hanger is empty of available planes, I do have an appreciation for the advantages of quick assembly and the role that it has in enabling one to get back to flying in a hurry. And so I decided to put my building and pride idiosyncrasies aside and focus instead on getting another flyable plane into the hanger as fast as possible.
When it came to selecting a control line ARF, I looked for something that was similar in size and functionality to my Mustang and something that was affordable. I also wanted something that could use the engine from my Mustang (an OS 25LA-S Control Line ABN w/Muffler) thus helping with the affordability aspect until I could purchase a second engine. The Brodak Super Clown ARF looked to fit the bill. I had never worked with an ARF before so I wasn’t sure what to expect with any aspect of it but I decided to take a chance on the Super Clown.
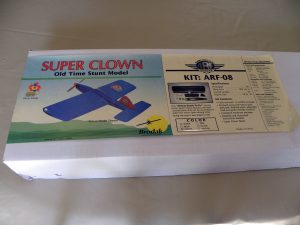
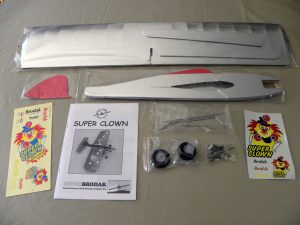
Brodak made sure that my first impression of the Clown was a good one…the packaging was great! The shipping packaging of this plane ensured that it arrived in one piece. Inside the model box itself, the individual components were well protected from any handling that was encountered during the shipping process. This especially applied to the wing, which was separately boxed and protected inside the primary model box.
While visually inspecting all the kit components, I was also impressed with the apparent quality of the components and especially the Monokote covering job that had been applied to the wing, fuselage, and various flight components. The Monokoting was tight and wrinkle free. This initial impression left me anxious to get to the actual ‘assembly’ of the kit.
(Click on photos to zoom in on them)
But before I even started assembly, I encountered an issue with the instruction manual. The ARF comes with an 11 page assembly instruction manual which features adequate textual descriptions of the assembly process and plenty of assembly photo illustrations. However, the photo illustrations were basically non-usable. The instruction manual was a photocopied document and all the photo illustrations were very dark to the point of being unusable. Someone who has not built a model before would potentially have some issues during plane assembly if they needed to rely on the photos for assistance. Fortunately, for me I was able to work around the poor photos.
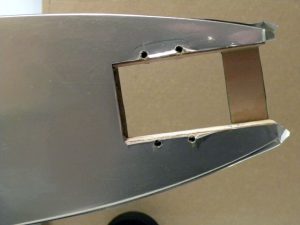
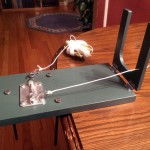
Next, I ran into an issue with the engine mounting bolt holes in the hardwood motor mounts. The spacing between the hardwood motor mounts was too wide for the mounting flanges on the engine. I had also run into this particular issue with the Mustang, so I am not attributing the issue to the Super Clown but rather to a narrow engine. On the Mustang, I had to use epoxy to laminate in additional hardwood to support the engine. I wanted to avoid this time consuming (and messy) solution if at all possible with this plane. I determined that with very careful drilling, I would have just enough hardwood available to catch the mounting bolts. But this meant VERY careful drilling and with my existing tools and shaky hands, I knew I could not do it. But I knew that a small bench top drill press would do it! This tool has been on my purchase list for a long time so this became a great opportunity to make the purchase. And Harbor Freight Tools came thru for me with a great sale on just the type of drill press I was looking for. I spent a night purchasing and assembling the drill press and then the next night I carefully, and successfully, drilled the holes. By the way, did I mention that affordability was one of my goals with this plane? This ARF had already cost me the price of a new drill press!
Gluing in the elevator hinges was up next and I ran into an issue with that. The instructions indicated to glue the hinges in using CA glue while being careful not to get any glue into the hinge pins. I am here to tell you that that is virtually impossible to do with CA! Needless to say, the hinges pretty much locked up at the hinge pins no matter how careful I was. I ended up tearing out the hinges and moved on to using epoxy, which is what I have used in the past. And here is where I first ran into the issue of trying to assemble an airplane that has already been covered. Even with trimming away the Monokote where I needed to glue in the hinges, I still managed to get some epoxy on the surrounding Monokote while inserting the hinges into their slots. This epoxy invariably made its way onto the hinge pins once the hinges were fully inserted and despite much cleaning of the hinge pins, the epoxy managed to interfere with the smooth functioning of the hinges. I worked through this hinge glue issue on all the hinges with the elevator and the flaps. I have to assume that I am doing something wrong but given that I’ve never had this issue with hinges in the past, I have to lay the blame on the fact that the plane was pre-covered with the Monokote. I understand that pre-covering the plane is part of the ARF process but I’m not liking that part of it.
I ran into similar gluing issues when attaching the wing, stabilizer assembly, and rudder. You need to cut away the Monokote where the glue joints are but yet leave enough covering so as to not expose much bare wood once the parts are assembled. This results in glue getting on the Monokote along the edges of the glue joints. Trying to then work that glue into smooth fillets is nearly impossible without getting glue all over the rest of the surrounding covering.
In fact, by the time I was done with all the gluing and assembly, the entire plane was a mess due to glue smears all over it from my handling of the plane during gluing. No matter how careful I tried to be and how hard I tried to keep my hands clean of glue, some invariably managed to get on surfaces of the plane. Fortunately, once the plane was fully assembled, I was able to clean most of the glue mess up by giving the entire plane an acetone bath.
All this points to the fact that gluing together pre-covered parts is a much ‘messier’ process than gluing parts together prior to covering them. In this later instance, any glue joints can be worked and cleaned up before any covering is applied thus resulting in very clean and good-looking joints and fillets. And any glue that makes its way onto other structural surfaces can be sanded off or otherwise cleaned up before covering the plane. But, again, I understand that this glue situation is a result of the need to have the plane pre-covered in order for it to be an ARF.
One other minor issue that I ran into with the flap hinges was that only 1/2 of the hinge slots for the flaps were pre-slotted. This resulted in me making a quick trip to the local hobby shop to pick up a hinge slotting tool kit. This slotting tool kit had also been on my ‘to buy’ list and with it I was able to cut the slots fairly quickly. However, I feel that an ARF should have had all the slots pre-cut and having to cut hinge slots would be a frustration to someone who wasn’t prepared to have to cut their own slots.
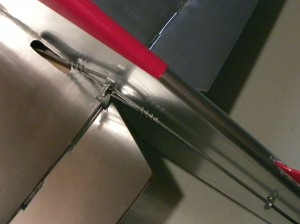
While the control horn and pushrod assembly was very straightforward, I encountered two items that were new to me. The two pushrod ends that connected to the flaps control horn were secured in place with spring pushrod keepers. I’m told these spring keepers have been around for a long time, however, I have never seen one before. I like the way they work! Here is a photo of the two spring pushrod keepers.
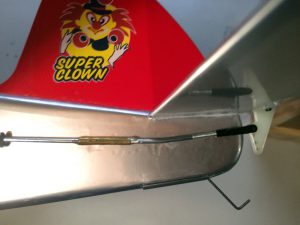
The other item still has me pondering the necessity of it. The pushrod was split into two sections and there was a brass sleeve that was used to connect the two sections together. The instructions made no mention of this connection and left me wondering why the pushrod was split into two sections and how to keep the two pushrod sections secured in the brass keeper. The keeper was split down the length of it, which led me to think maybe it should be swedged on, however, my attempts to do this resulted in nothing happening. I considered soldering the pushrods into the keeper but my soldering iron is still packed away in a box somewhere. Finally, I decided to run a bead of CA down the length of the split in the keeper and I followed that with a bead of epoxy down the slit and around the ends of the keeper. This seems to be working fine but I’m left wondering if this is the correct way to connect everything together. Here is a photo of my completed pushrod connector assembly.
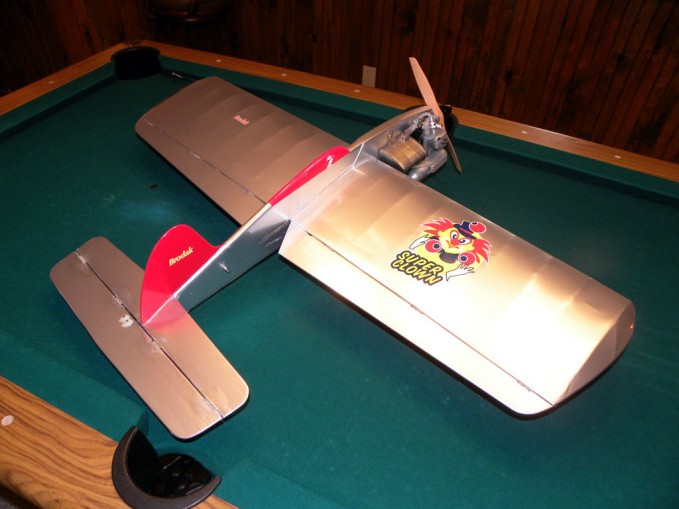
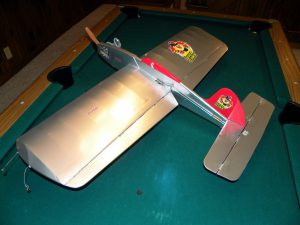
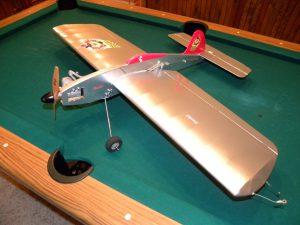
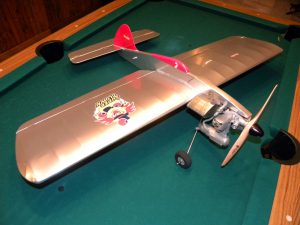
The rest of the assembly and the installation of the landing gear, engine, and fuel tank all proceeded without issue. With assembly complete, I ran my Monokote iron over the entire plane especially around the edges and the engine area which had loose Monokote due to my work on the engine mounting holes. I then gave the plane the acetone bath mentioned above and added some of the decals that were included with the ARF. And this leads me to my final ‘issue’ with the plane and it has nothing to do with the ARF itself. Rather, my issue is with the name ‘Super Clown’. Personally, I think it is a rather stupid name for a model airplane! I’ve been told that the name has been around for generations and that by disparaging it, I’d be considered a heretic by some in the hobby! Nonetheless, I stick by my assessment of the name. Despite my personal feelings, I did add a couple ‘Super Clown’ decals to the plane as a means of ‘dressing it up’! I then took these photos of the completed ARF before heading to the flying field with it.
The day of the maiden flight was windy and cold so only two flights were attempted. The first flight went great with the ARF flying straight and true. It was much lighter on the control lines than the Mustang and that will take some getting used to. I did attempt a few loops and by the third loop, I had gotten the feel for it and it performed a very clean, smooth loop. I see a lot of potential for some great flying time with this ARF.
The second flight was basically straight and level as I felt I had no down control. I landed the plane without incident and nothing was found to be wrong with the plane. It was noted that my elevator throw movement was rather limited and this coupled with the increasing wind may have impacted the down control. I have since moved the elevator pushrod to the inner hole in the elevator control horn resulting in much greater elevator movement, including an appropriate amount of ‘down’ movement.
CONCLUSION:
Despite the assembly issues noted above, I was overall pleased with the final product. The ARF is a nice looking plane and seems to have great flying potential. While the ARF is advertised as being able to be assembled in 5 hours (plus drying time), I think it took me 3 to 4 times that long to assemble. I blame this on my very slow approach to building/assembling models coupled with dealing with the issues listed above. Still, it was considerably faster than building, covering, and assembling an entire kit from scratch. So, the ARF fulfilled the goal of getting me back into the air in a shorter amount of time.
Pro’s
- High quality components and covering
- Very good flying qualities (initial impressions)
- Good looking model
Con’s
- Poor instruction manual photos
- Poor Instructions stating to CA hinges
- Pushrod assembly not documented
- Stupid plane name
Brodak Manufacturing
Super Clown Kit (ARF)
Item #CLP-6
Wingspan: 38″
Length: 24″
Engine Size: .19 to .35
MSRP: $89.99


