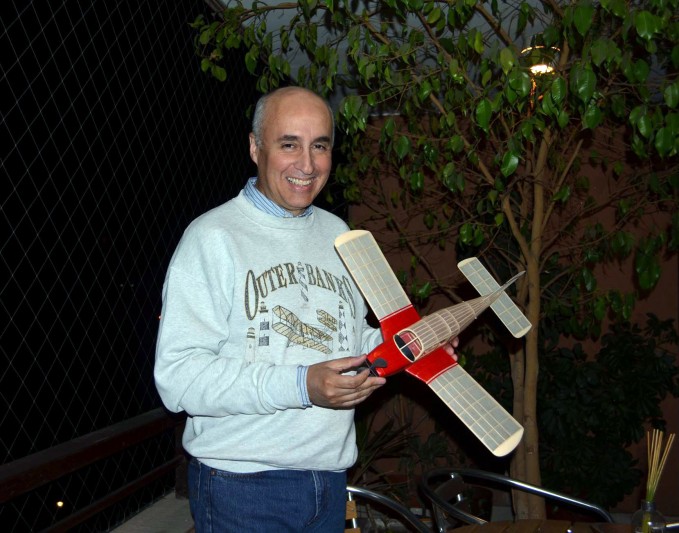
Last week, I introduced Claudio Elicer Avalos through his post about being an aviation enthusiast living in Chile, South America. Claudio had graciously agreed to share his building and flying experiences with others via a series of FlyBoyz Guest Posts.
What started out as two posts is now being presented as three. Claudio’s first post focused on his full scale aviation experiences and the lessons he applied from it to his model flying. This second post features his awesome build of his PA-28 free flight model and ends with a brief video of his first test flight of the PA-28. Unfortunately, the first test flight did not result in a satisfactory flight so Claudio made some modifications to the PA-28. Following the modifications, he achieved a much more successful flight. The modifications to the plane as well as the resulting flight video will be featured in the third post.
As with the first post, this post is being presented in both an English translation and in Spanish exactly as Claudio wrote it. In this post, the Spanish version is presented in an indented fashion under the English version. You can zoom in on the photos by clicking on them.
As before, I hope everyone enjoys these posts and appreciates both Claudio’s efforts at preparing them as well as the level of craftsmanship he displays in building his PA-28. Please feel free to leave comments to Claudio.
Here now is Part 2 ‘Building a PA-28, a Real Challenge‘ of Claudio’s report from South America!
Building a PA-28, a Real Challenge
Construcción de un PA-28, un Verdadero Desafío
Claudio Elicer Avalos – November 2014
Claudio Elicer Avalos – Noviembre 2014
Start
Inicio
Of all the planes that I could fly, I have to say that one of the most attractive was the PA-28 Cherokee 180. Their lines, proportions, power and versatility to me were not indifferent. To build a scale model, I started looking for a flat or three views of the real plane that I wanted to build. My search began on the Internet. What I ideally wanted was a drawing of the real plane and cross sections of the airplane in order to build a real scale model with actual sections of the aircraft. These figures can be found on the Internet for some aircraft such as the Cessna, but was not the case for the Piper I was looking for. Then I turned to the model kit of Guillow’s for the PA-28-140, whose design is similar to PA-28-180, especially the tail, but differs in the front and center of the fuselage. It also had the actual dimensions, which appear in the plane manual, and photos that I downloaded from the Internet.
De todos los modelos de aviones que pude volar, debo decir que uno de los más atrayentes fue el PA-28 Cherokee 180. Sus líneas, sus proporciones, su potencia y versatilidad no me fueron indiferentes. Para construir un modelo a escala, comencé buscando un plano o tres vistas del avión real que quería construir. Mi búsqueda comenzó en internet. Lo que idealmente buscaba era un dibujo del avión real y secciones transversales del avión para poder construir una maqueta real del modelo con secciones reales del avión. Estas figuras se pueden encontrar en internet para el caso de algunos aviones, tales como los Cessna, pero no fue el caso para el Piper que buscaba. Entonces recurrí al modelo del kit de Guillow’s para el PA-28-140, cuyo diseño es similar al PA-28-180, especialmente la cola, pero difiere en el sector frontal y central del fuselaje. También tenía las dimensiones reales, que aparecen en el manual del avión, y fotografías que descargué de internet.
With all this information I modified the Guillow’s plane kit and got an approximate plane, but with the proportions of real aircraft. In this work, I defined the location of the fuselage sections, so as to minimize the number of these without sacrificing rigidity of the structure.
Con toda esta información modifiqué el plano del kit Guillow’s y obtuve un plano aproximado, pero con las proporciones del avión real. En este trabajo definí la ubicación de las secciones del fuselaje, de modo de minimizar el número de éstas sin sacrificar rigidez de la estructura.
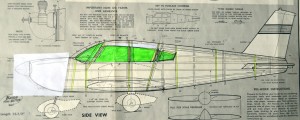
The cross sections I designed from modifications made to the fuselage, but only correspond to approximations.
Las secciones transversales las diseñé a partir de las modificaciones que hice al fuselaje, pero sólo corresponden a aproximaciones.
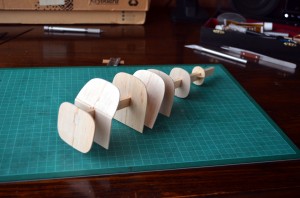
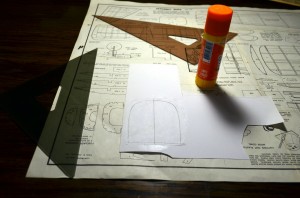
Once the fuselage sections were designed, I copied only half on a semi transparent paper to complete the other half by folding the paper in half and copying what is missing.
Una vez diseñadas las secciones del fuselaje, copio sólo la mitad sobre un papel semi transparente, para completar la otra mitad doblando el papel en el eje y copiando lo que falta.
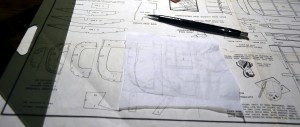
Copied from the half of the cross sections of the fuselage.
Copiado de la mitad de las secciones transversales del fuselaje.
Thus the maximum symmetry for these complex sections with compound curves of multiple radius is achieved.
De esta manera se logra la máxima simetría para estas secciones complejas, con curvas compuestas de múltiples radios.
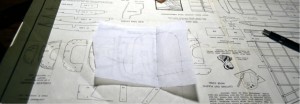
By folding the paper in half is achieved the symmetry of each section.
Plegando el papel en el eje se logra la simetría de cada sección.
Structuring of fuselage and wings
Estructuración de fuselaje y alas
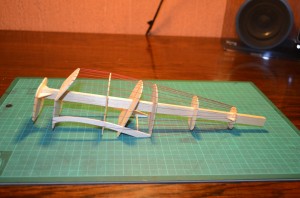
The first thing I did was to build a 3D model of the model with the cross-sections that had been defined for the fuselage, in order to visualize which positions would have the side members and to detect any error in the estimation of the fuselage sections. I did the mock-up with full sections filled with second-class balsa. The stringers were represented with wires glued to sections. This enabled me to detect some inconsistencies that could be corrected before starting to cut sections.
Lo primero que hice fue construir una maqueta 3D del modelo con las secciones transversales que había definido para el fuselaje, con el objeto de visualizar en qué posiciones iba a disponer los largueros y para detectar cualquier error en la estimación de las secciones del fuselaje. La maqueta la hice con secciones llenas y con madera balsa de segunda clase. Los largueros los representé con hilos pegados a las secciones. Esto me permitió detectar algunas inconsistencias que pude corregir antes de empezar a cortar las secciones.
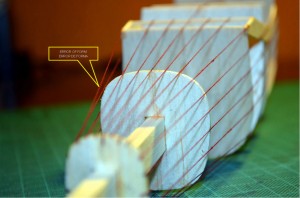
Detecting an error in estimating the shape of one of the fuselage sections.
Detección de un error en la estimación de la forma de una de las secciones del fuselaje.
Having defined the above and corrected the errors, I started by cutting cardboard molds of the sections. For this, I transferred to cardboard sections drawn in the semi transparent paper.
Una vez definido todo lo anterior y corregido los errores, comencé por cortar los moldes de las secciones en cartulina. Para ello transferí a cartulina las secciones dibujadas en el papel semi transparente.
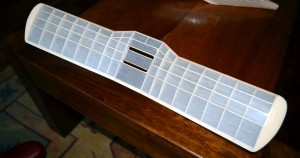
For the wings, my experience tells me that it is not necessary to consider a central beam as the main structural element, especially in models as light as this. In its place, I use external rods, which confer structural rigidity by the contour of the wing, which added to the tension from the tight covering, produces excellent torsional rigidity in the fragile structure.
Para las alas, mi experiencia me indica que no es necesario considerar una viga central como principal elemento estructural, sobre todo en modelos tan livianos como este. En su reemplazo utilizo varillas exteriores que confieren rigidez estructural por el contorno del elemento, lo que sumado a la tensión que da el papel una vez tensado, produce a la frágil estructura una rigidez flexo torsional excelente.

Simply use outside stringers instead of a central beam to achieve the necessary rigidity. The tips of the wings are foam.
Basta con utilizar largueros exteriores en vez de una viga central para lograr la rigidez necesaria. Las puntas de las alas son de foam.
Choice of woods
Elección de las maderas
Before cutting the pieces, I carefully chose the wood that was used in the sections of the fuselage. I used a sheet of 1/32 “thick, medium density.
Antes de cortar las piezas, escogí cuidadosamente la madera que iba a utilizar en las secciones del fuselaje. Utilicé chapa de 1/32” de espesor, densidad media.
Construction of cross sections of the fuselage
Construcción de las secciones transversales del fuselaje
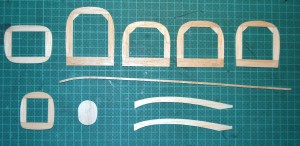
To cut the cross sections of the fuselage, I build boxes over over-sized rectangles, as shown in the following photo. This maximizes the strength of the section to have the grain of the wood parallel to all the contours.
Para cortar las secciones transversales del fuselaje, construyo rectángulos sobre dimensionados, tal como se muestra en la siguiente fotografía. Esto permite maximizar la resistencia de la sección al disponer la veta de la madera paralela a todos los contornos.
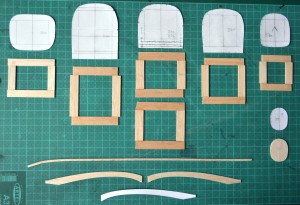
Cross sections on their outer molds sized and ready to cut.
Secciones transversales sobre dimensionadas y sus moldes exteriores, listo para cortar.
Before trimming the interior surplus sections, is very important to cut the outer cutouts where the stringers will be added. For this, I used a very simple but very effective tool made with sandpaper glued onto a stringer of the same section, in this case square sections of 1/20″. This procedure is recommended if you want to make cutouts on very fragile pieces (” jigsaw , drill, before cutting” ).
Antes de recortar el excedente interior de las secciones, es muy importante realizar los calados exteriores, donde se alojarán los largueros. Para ello usé una herramienta hechiza muy sencilla pero muy efectiva, hecha con lija pegada sobre un larguero de la misma sección, en este caso secciones cuadradas de 1/20”. Este procedimiento es recomendable siempre que se desee hacer calados sobre piezas muy frágiles (“calar, perforar, antes de cortar”).
I used the same openwork method for the ribs of the wings.
El mismo método de calado lo utilicé para las costillas de las alas.
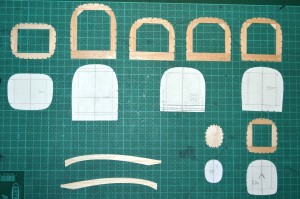
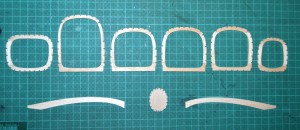
Open works done before cutting the interior of the sections away.
Calados hechos antes de recortar el interior de las secciones.
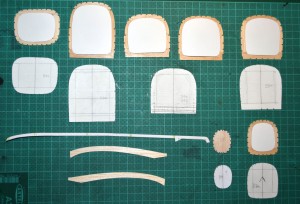
Inner templates in position before cutting the interior of the sections away.
Moldes interiores en posición, antes de recortar el interior de las secciones.
Then I cut the surplus inside sections with molds ad oc.
Luego corté el excedente interior de las secciones, con moldes ad oc.
Assembly of fuselage and wings
Ensamblado de fuselaje y alas
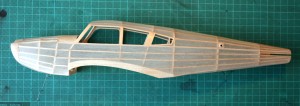
Then I started the assembly of the fuselage. This work is delicate. The final result depends on precision alignment of the pieces. For that reason, I used the grid on the cutting board, tape and brackets to ensure the orthogonality of the sections with respect to the longitudinal axis of the fuselage. There are other ways to do this, for example assembling the middle sections of the fuselage. I do not use that method because I save the weight of the upper and lower keels that are necessary to do that.
A continuación comencé el armado del fuselaje. Este trabajo es delicado. De la precisión del alineamiento de las piezas depende el resultado final. Para ello me ayudé del cuadriculado del tablero de trabajo, papel engomado y escuadras para asegurar la ortogonalidad de las secciones con respecto al eje longitudinal del fuselaje. Existen otros métodos para hacer esto, como por ejemplo armar por medias secciones del fuselaje. Yo no uso ese método porque ahorro en el peso de las quillas superior e inferior que son necesarias para hacer eso.
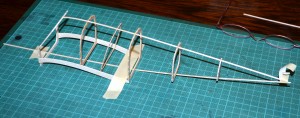
Using masking tape and grid board to align the pieces before joining. To glue, I use cyanoacrylate.
Utilización de maskin tape y el cuadriculado del tablero para alinear las piezas antes de unir. Para pegar utilizo cianocrilato.
Once the upper and lower spars are in position, I began to fix the rest of the spars, by opposing pairs to avoid uneven stresses.
Una vez en posición los largueros superior e inferior, comencé a fijar el resto de los largueros, por pares opuestos para evitar tensiones asimétricas.
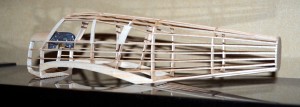
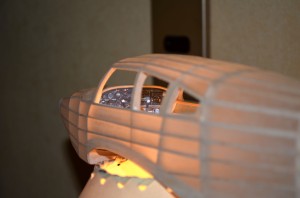
Partially assembled fuselage The dashboard is printed out from a real picture.
Fuselaje parcialmente armado. El dashboard lo hago a partir de una foto real con impresora.
For assembly of the wings, I highlight an important detail. In low-wing models it is highly recommended to add wash out to the wings for stability without increasing too much the dihedral angle. This consists of twisting the wing so that the wing root (which is attached to the fuselage) has a slightly higher angle of attack than the wing tips.
Para el armado de las alas destaco un detalle importante. En modelos de ala baja es altamente recomendable darle wash out a las alas para obtener estabilidad sin tener que aumentar demasiado el ángulo diedro. Esto consiste en torcer el ala, de modo que la raíz del ala (que va adosada al fuselaje) tenga levemente mayor ángulo de ataque que las puntas de las mismas.
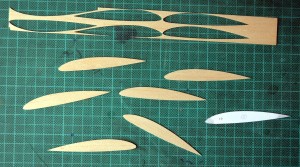
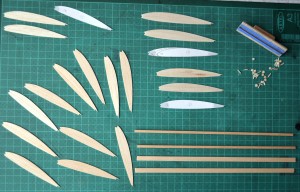
Cut the wing ribs from cardboard molds. The stringer cutouts are made after cutting out the pieces.
Cortado de las costillas de las alas utilizando moldes de cartulina. Los calados se realizan después de cortadas las piezas.

Cut to accommodate the outer spars. Made with the tool shown on the right.
Calados para alojar los largueros exteriores, hechos con la herramienta mostrada a la derecha.
To achieve this, you need to glue the pieces with the final twisted wing shape. This can be achieved by raising the trailing edge of the wing tip lightly with a piece of wood before gluing the stringers and ribs, helping with tape.
Para lograrlo, es necesario pegar las piezas con la forma torcida definitiva del ala. Eso se puede lograr levantando el borde de fuga de la punta del ala levemente con un trozo de madera, antes de pegar los largueros y las costillas, ayudándose con papel engomado.
Covering
Cubrimiento
For the tissue, I just want to emphasize the orientation of the grain of the paper should always be in the direction of the greatest length of the structure to be filled. I use as adhesive glue diluted to 50%. To tighten the paper, I use water spray, small quantities.
Para el entelado sólo quiero hacer énfasis en la orientación de la veta del papel: debe ser siempre en el sentido de la mayor longitud de la estructura que se va a cubrir. Yo utilizo como pegamento cola vinílica diluida al 50 %. Para tensar el papel, utilizo agua atomizada, poca cantidad.

I begin by gluing paper to the bottom of the fuselage.
Comienzo pegando el papel de la parte de abajo del fuselaje.
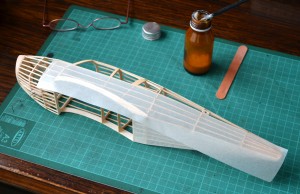
Next I glue paper to the sides. I cut the surplus once the glue dries.
A continuación pego el papel de los laterales. Corto el excedente una vez seco el pegamento.
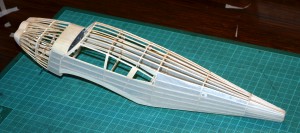
Finally, I paper at the top, using as many pieces as necessary to prevent wrinkles.
Finalmente pego el papel de la parte superior, utilizando tantas piezas como sea necesario para evitar arrugas.
Dope
Dope
Once finished with the tissue on the different parts of the model, I tightened the tissue taut with water spray and applied two coats of well diluted dope.
Una vez finalizado el entelado de las diferentes partes del modelo, tenso el papel con agua en spray y aplico dos manos de dope bien diluido.
Painting and letters
Pintura y letras
To apply the decorations to the model, I recommend doing so before assembling the parts of the model. For this, I use colored tissue when the decoration consists of straight lines, glued with diluted white glue or acrylic paint applied with an airbrush or brush.
Para aplicar el decorado del modelo, recomiendo hacerlo antes de ensamblar las partes del modelo. Para ello utilizo papales de colores, cuando la decoración está compuesta por líneas rectas, pegadas con cola vinílica diluida, o bien con pintura acrílica aplicada con aerógrafo o pincel.
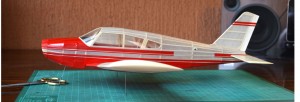
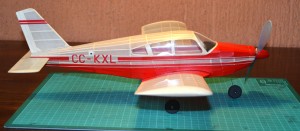
In this model I used acrylic paint, applied directly to the paper of the fuselage, and paper previously painted and then cut into strips, which I stuck with diluted white glue for the fine lines. The windows I made with plastic photocopies.
En este modelo utilicé pintura acrílica, aplicada directamente sobre el papel del fuselaje, y para las líneas finas utilicé papel previamente pintado y luego cortado en tiras, las cuales pegué con cola vinílica diluida. Las ventanas las hice con plástico para fotocopias.
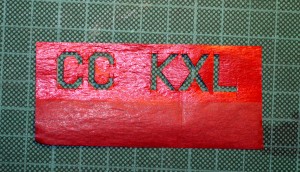
Details of the use of red paper painted with red acrylic paint, prior to cutting and pasting.
Detalle del uso de papel rojo pintado con pintura acrílica roja, previo al cortado y pegado.
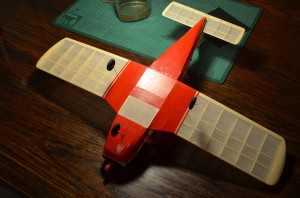
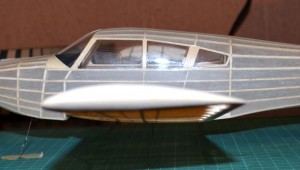
Detail of the completion of the fuselage, before painting.
Detalle de la terminación del fuselaje, antes de pintar.
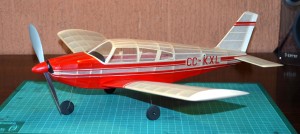
The wheels were made with rubber mouse pad, propeller used is commercial Peck Polymers.
Las ruedas fueron hechas con goma de pad mouse, la hélice utilizada es comercial Peck Polymers.


