This is the last of three FlyBoyz Guest Posts presented by Claudio Elicer Avalos. Claudio had graciously agreed to share his building and flying experiences about being an aviation enthusiast living in Chile, South America.
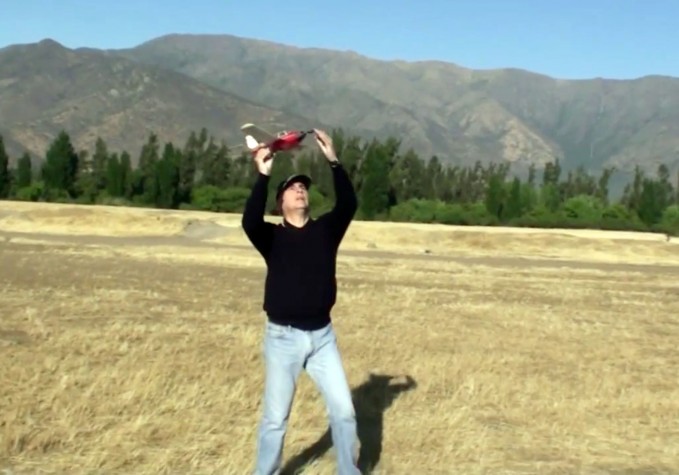
Claudio’s first post focused on his full scale aviation experiences and the lessons he applied from it to his model flying. His second post featured his awesome build of his PA-28 free flight model and ended with a brief video of his first test flight of the PA-28. Unfortunately, the first test flight did not result in a satisfactory flight so Claudio made some modifications to the PA-28. Following the modifications, he achieved much more successful flights. The modifications to the plane as well as the resulting flight video are being featured in this third post.
As with the first two posts, this post is being presented in both an English translation and in Spanish exactly as Claudio wrote it. The Spanish version is presented in an indented fashion under the English version. You can zoom in on the photos by clicking on them.
As before, I hope everyone has enjoyed these posts and appreciates both Claudio’s efforts at preparing them as well as the level of craftsmanship he displays in building and flying his PA-28. Hopefully, we’ll be hearing and seeing more from South America! Please feel free to leave comments to Claudio.
Here now is Part 3 ‘Building a PA-28, Modifications and Flight‘ of Claudio’s report from South America!
Building a PA-28, Modifications and Flight
Construcción de un PA-28, Modificaciones y Vuelo
Claudio Elicer Avalos – December 2014
Claudio Elicer Avalos – Diciembre 2014
Third Part
Tercera Parte
Once the model was finished, came the stage of flight testing and tuning. I planned the first test flight in the field based on my experiences with other models made by me, of similar low-wing configuration like the PA-28.
Una vez terminado el modelo, vino la etapa de prueba de vuelo y puesta a punto. Planifiqué la primera prueba de vuelo en el campo basándome en mi experiencia en otros modelos confeccionados por mí, de configuración de ala baja igual que el PA-28.
The first thing I did was set the models center of gravity to 1/3 of the chord from the leading edge of the wing. To do this, I put some lead shot in the nose. I also bent the propeller shaft about 2° and put the elevator in neutral.
Lo primero que hice fue fijar el centro de gravedad del modelo a 1/3 de la cuerda desde el borde de ataque del ala. Para ello puse algunos perdigones de plomo en la nariz. También incliné el eje de la hélice unos 2° y puse el elevador en posición neutra.
First attempt: 70 turns to the rubber, the model falls nose to the ground. The first thing to try to correct is the position of the elevator, which went against my own earlier analysis … this time the model takes a pitch and then again to the ground. What is happening?
Primer intento: 70 vueltas a la goma, el modelo cae de nariz al suelo. Lo primero que trato de corregir es la posición del elevador, lo que iba en contra de mi propio análisis anterior….esta vez el modelo realiza un cabeceo y luego nuevamente al suelo. Qué está pasando?
Second attempt: I change the rubber with a larger section in order to achieve greater traction. The result was that the model began a marked pitch, with an unstable flight and a very marked P factor, producing a sharp left turn.
Segundo intento: cambio la goma por una de mayor sección, con el objeto de lograr mayor tracción. El resultado fue que el modelo comenzó un cabeceo muy marcado, con un vuelo inestable y con un factor P muy acentuado, produciendo un viraje cerrado a la izquierda.
After a couple of flights with this configuration, I decided to save the model, as the wind began to play against, with the risk of breaking the model.
Después de un par de vuelos con esta configuración, decido guardar el modelo, ya que el viento comenzó a jugar en contra, con el riesgo de romper el modelo.
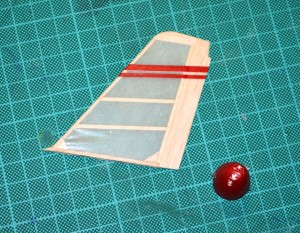
Only minor damage occurred during the first test flight.
Sólo daños menores se produjeron durante la primera prueba de vuelo.
I remember that I went home wondering what had gone wrong, maybe the angle of the wing was wrong, or perhaps the angle of the propeller had been exaggerated. One thing was certain: the weight of the model was adequate, since the wing loading (weight/wing area) I got was equal to or less than the wing loading of my other models that I had flown very well.
Recuerdo que regresé a casa pensando qué había salido mal, tal vez el ángulo de ataque del ala era incorrecto, o tal vez el ángulo de la hélice había sido exagerado. De una cosa estaba seguro: el peso del modelo era adecuado, ya que la carga alar (peso/área del ala) que obtuve fue igual o menor que la carga alar de otros modelos míos que me habían volado muy bien.
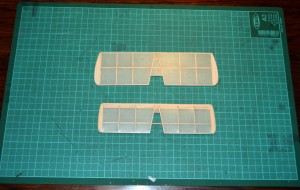
There passed several days when I decided to not touch the model. It was clear that I had no answer and that any change could worsen the situation. After a month and after much thought about the problem, I thought of enlarging the area of the empennage (elevator and rudder). I remembered that I had once had a similar problem with another model and that on enlarging the empennage the situation had improved.
Pasaron varios días en que no me animé a tocar el modelo. Estaba claro que no tenía la respuesta y que cualquier modificación podría empeorar la situación. Al cabo de un mes y después de mucho meditar sobre el problema, pensé en agrandar el área de los planos de cola (elevador y timón). Recordé que tiempo atrás había tenido un problema similar con otro modelo y que al agrandar el empenaje la situación había mejorado.
The question was, how much more should I enlarge the planes? Again I resorted to my experience and determined the proportion in which I had increased the planes of that other model to increase those of the PA-28.
La pregunta fue: cuánto más debía agrandar los planos? Nuevamente recurrí a mi experiencia y determiné la proporción en que había aumentado los planos de aquel otro modelo para aumentar los del PA-28.
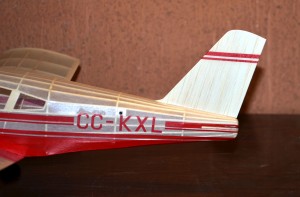
Another modification that I made was to build a sheet rudder instead of sticks and paper as I had done at first. I did this to make small adjustments without adding rudder hinges for it. My original idea was to calibrate the rudder adjustment to achieve a proper rotation pattern and then replace the rudder with another stick and paper rudder with the defined angle, but I may not do this because the aesthetic that I made with the sheet rudder does not displease me completely.
Otra modificación que incorporé fue construir el timón de chapa en vez de varillas y papel como lo había hecho al principio. Esto lo hice para poder hacer pequeños ajustes al timón sin necesidad de incorporar bisagras para ello. Mi idea original fue poder calibrar el calaje del timón para lograr un patrón de giro adecuado y luego reemplazar el timón por otro de varillas y papel con el ángulo definido, pero tal vez no lo haga porque la estética que logré con el timón en chapa no me desagrada del todo.
Once I made the changes to the empennage, I did some test glides and for the first time achieved a stable flight attitude. I also modified the center of gravity of the model, moving it slightly back, being almost in the center of the cord. This does not quite agree with the literature for centering models available for low wing (Flying Scale Models of WWII, 1974 and others), but empirically determined the best CG position to achieve a steady glide. Once this was achieved, the only outstanding setting I left for the power test was to vary the angle of the propeller shaft.
Una vez realizado los cambios al empenaje, realicé algunas pruebas de planeo y por primera vez logré una actitud de vuelo estable. También modifiqué el centro de gravedad del modelo, desplazándolo un poco hacia atrás, quedando casi en el centro de la cuerda. Esto no está muy de acuerdo con la literatura disponible para centraje de modelos de ala baja (Flying Scale Models of WWII, 1974 y otros), pero determiné empíricamente la mejor posición de CG para lograr un planeo estable. Una vez logrado esto, el único ajuste pendiente que dejé para la prueba con potencia es variar el ángulo del eje de la hélice.
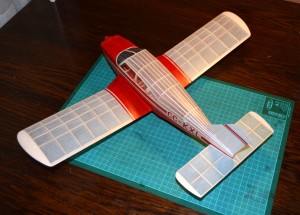
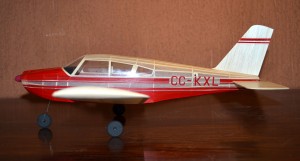
Model finished with changes in the empennage, I took care that the proportions were not exaggerated.
Modelo terminado con las modificaciones en el empenaje, cuidé que las proporciones no fueran exageradas.
Long days of waiting passed before testing the model, waiting for suitable weather conditions. Finally, after almost two months since the first flight, I could make the second attempt, which was pretty good. I immediately realized that the changes had taken effect, and after a small adjustment to the angle of the propeller achieved a stable and long flight.
Pasaron largos días de espera antes de probar el modelo, aguardando las condiciones de clima adecuadas. Finalmente, después de casi dos meses desde el primer vuelo pude realizar el segundo intento, el cual fue bastante bueno. Inmediatamente me di cuenta que los cambios habían surtido efecto, y después de un pequeño ajuste al ángulo de la hélice logré un vuelo estable y prolongado.
Gradually, I began to increase the number of turns to the engine, achieving increasingly long flights. Then I changed to a longer rubber (maximum 1.5 times the length between hooks), using the same section.
Gradualmente comencé a aumentar el número de vueltas al motor, logrando vuelos cada vez más largos. Luego cambié a una goma más larga (máximo 1,5 veces la longitud entre ganchos), utilizando la misma sección.
Finally, I want to highlight an important detail that I learned from this model. The position of the CG on a low-wing model is much more critical than in a high wing. This means that any imbalance in the CG that occurs during discharge of the rubber, especially due to the movement of the knots of the rubber forward and backward during discharge will cause the model to pitch, especially towards the end of the flight. To avoid this, I take care to thoroughly lubricate the rubber and load it as stretched as possible, and also by arranging the rear pin of the rubber, so that the center of the rubber (loop ) is near the center of gravity of the model. Thus, any forward and backward movements of the rubber knots produce a smaller imbalance in the model during flight.
Finalmente, quiero destacar un detalle importante que aprendí de este modelo. La posición del CG en un modelo de ala baja es mucho más crítica que en uno de ala alta. Ello significa que cualquier desbalance del CG que se produzca durante la descarga de la goma, en especial debido al movimiento de los nudos de la goma hacia adelante y hacia atrás durante la descarga, hará que el modelo tienda a cabecear, sobre todo hacia el final del vuelo. Para evitar esto, cuido de lubricar bien la goma y de cargarla lo más estirada posible, y también disponiendo el pasador trasero de la goma, de modo que el centro de la espira de goma (loop) quede cercano al centro de gravedad del modelo. De este modo, los eventuales movimientos adelante y atrás de los nudos de la goma producirán un desbalance menor en el modelo durante el vuelo.


