About 10 days ago, I went out and flew the Clown again. Since I’d gotten pretty comfortable with inverted flight and figure 8’s, I decided that it was time to start working on a new stunt. The one I chose to work on was going inverted from a wingover (I currently go inverted at the top of an inside loop).
After a successful ’shake-down’ flight with my normal stunt routine, I took to the air for flight #2. About 2 minutes in, I decided to try the wingover to inverted flight. And I was successful! However, it was VERY sloppy and uncoordinated. But it worked. After a few more normal laps, I decided to give it another try. This one was not so successful! I made it inverted but somehow lost my eye/hand orientation and the plane started to go down. So I did the normal thing and gave it up. And promptly flew it directly into the ground! I still gotta remember that up is down when flying inverted!
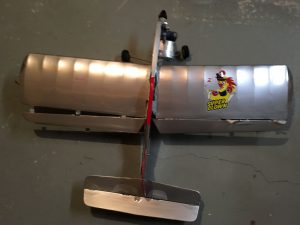
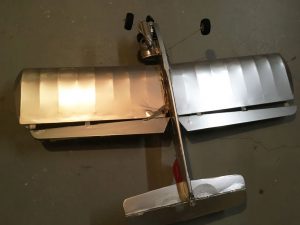
The Clown was a total wreck at this point. The two enclosed photos show some of the major damage. The wing, which is a one piece wing, completely split in two and crumpled at the fuselage. The tail surfaces were being held on only by their MonoKote covering. The flaps and elevators were completely broken out from their hinges. Upon further inspection, I found that even the fuselage was fractured yet again. I suspect that, even though the fuselage fractured, the reinforcing that I did to it in a prior crash transferred much of the impact forces to the wing and tail surfaces which is why they crumpled so badly. Here are a couple of photos of the wrecked plane. What I really should have done was taken a photo of the plane before I pulled it out of the ground. The entire spinner, (broken) prop, and front of plane were totally buried up to the main engine cylinder head!
(Click on graphics to zoom in on them)
I sent these photos to some of my friends and received a couple interesting comments back. My friend, FlyBoy Rick Houtz, a high school physics teacher, did not miss the opportunity to impress us all with some of his physics knowledge with his reply: ‘Looks like the fuselage stopped abruptly with ground contact but good ol’ Sir Isaac Newton and his Laws of Motion, specifically inertia with a bit of help from momentum and impulse theory took over on the wings and tail surfaces. The wings and tail surfaces were still moving after the fuselage stopped. If you have an idea of the speed of impact you could multiply that by the mass of the plane and then divide that by say a time of 0.01 seconds and that would give you an impact force. The forward swept wings are a result of torque applied to the wings by the center of mass of the wings.
Work with these numbers:
Force of impact on Wings
0.5 lbs = 0.227 kg mass of wings
1.5 sq. in. = 6.45 sq. cm. Contact area between wings and fuselage
speed at impact 85 km/hr = 23.6 m/s
impact time = 0.01 seconds
momentum of wings = 23.6 x 0.227 = 5.35 kgm/s
F = mv/t
Force of impact = 23.6 x 0.227 / 0.01 = 535 N = 120 pounds of force
Force / sq. cm = 535 / 6.45 = 83 N/ sq. cm = 120/1.5 = 80 pounds/sq. inch
Torque Applied (which split and swept wings forward)
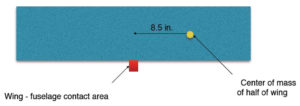
Wing length = 19 inches so center of mass of each wing is approximately 8.5 inches from pivot point (fuselage).
Wing total mass = 0.5 lbs or 0.25 lbs for each wing (left and right)
Wing speed at impact = 23.6 m/s
Force applied by center of mass of wing = wing mass x velocity /time = 0.114 x 23.6 /0.01 = 269N
Torque arm = 8.5 inches = 21.6 cm = 0.216 m
Torque produced by each wing = Force x torque arm = 269 N x 0.216 m = 58 Nm = 0.738 x 58 = 43 ft-pounds
However, my son, FlyBoy Corey O’Neill, had no problem translating Rick’s reply for the rest of us to understand: ‘In layman’s terms the force you wrecked your plane with was like a really, really fat person sitting on it.‘
In reality, Rick’s physics are correct in stating that the fuselage stopped upon impact but the wings and tail surfaces kept going forward. If you look at the photos, you’ll notice that the wings now are swept forward out to the wingtips. And the flaps, which are held ridgedly together by a steel control horn thru the fuselage, couldn’t pivot forward with the wings which is why they tore out at the hinges instead. Yes, the physics of this make perfect sense!
Given all the previous damage and repairs that had been done to this plane, it was not worth repairing it again at this point. So, I decided to purchase a new Brodak ARF Ringmaster. I’ve heard much about the Ringmaster over the years but have never owned one. It has a bigger wing than the Clown but no flaps thus giving me a different flight experience. It would be able to use all the same engine and tank parts from the Clown so the only real cost would be the ARF kit itself. The description of the plane stated that 5 – 6 hours of building time should have me airborne once again. Plus, with the Annual Worldwide Ringmaster Fly-A-Thon coming up in a few months, it would give me the opportunity to fly my own Ringmaster in the event.
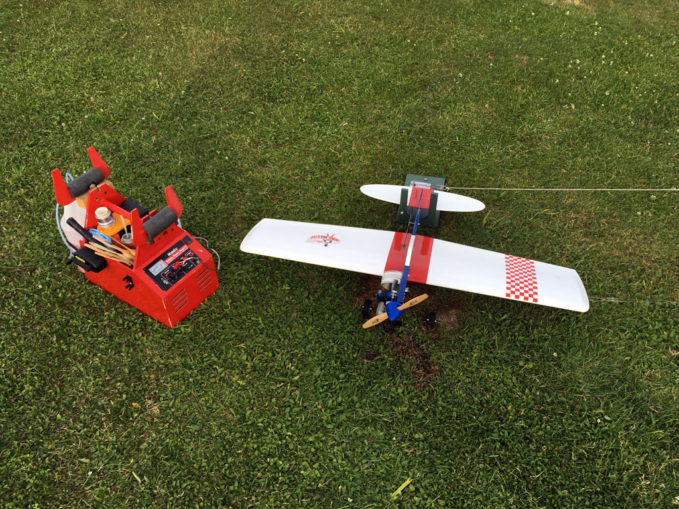
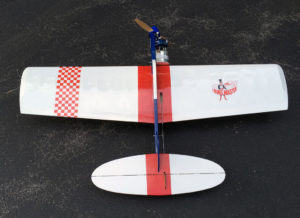
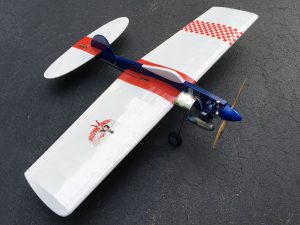
Thursday evening, the Ringmaster arrived from Brodak. This is my second ARF from Brodak (the Clown being the first) and I continue to be impressed by them. The packaging will withstand the roughest of handling and the quality of the ARF materials and construction is top notch. Over the course of the weekend, I spent roughly 10 hours on the construction of the kit. The catalog states 5 – 6 hours of construction time is needed but I tend to be somewhat slow and deliberate (some would say ‘anal’) in my construction practices thus the extra few hours spent by me. The kit comes in several color options. I chose the red, white, and blue (hey, it was a 4th of July build after all!). A blue prop spinner and my blue OS .25 LA engine went well with the blue fuselage. I think the final result looks pretty sharp. Here are a couple photos of the completed plane before its’ maiden flight.
Last night, I took the newly completed Ringmaster out to the STARS field for its’ maiden flight. I put three successful flights on the plane. And my first reaction is that it is responsive! The reactions of this plane to control handle inputs is definitely a step up from the Clown which is more of a flight trainer. Also, the lack of flaps give this plane a whole different feel. Basically, I feel like the plane pivots (immediately!) around the center point of the fuselage when given control line flight inputs.
Besides a weight box in the outboard wingtip, the plane comes with an adjustable leadout guide in the inboard wingtip. Both of these are features that I’ve never had in a plane before. I used the recommended .75 oz. of wingtip weight in the weight box and that seems appropriate. However, I do want to adjust the leadout wires back one click (1/8″) in order to increase the line tension a bit during flight as the line tension seemed to be a bit sloppy when coming out of inside loops.
During my third, and final, flight of the night, I got up the nerve to take the Ringmaster inverted. With the controls being so sensitive, I was not sure how it would be taking it inverted. I (or should I say, the Ringmaster) survived the attempt! I succesfully took it inverted a couple more times. However, I decided to forego the figure 8’s since I wanted to ensure that I was able to take my new plane home in the same condition that I took it to the field in! I’ll probably try figure 8’s during my next flight session. But, I will be holding off on going inverted from a wingover for a bit!


