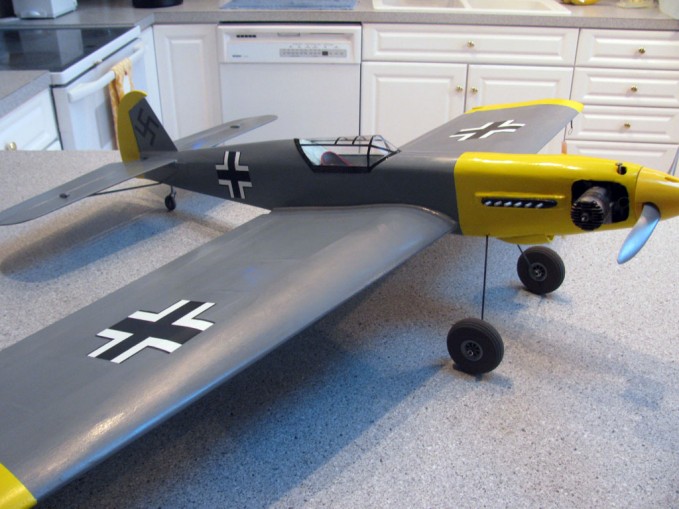
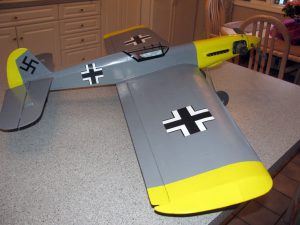
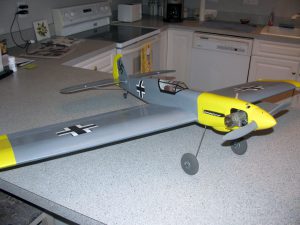
Unfortunately, due to efforts to get our house ready for a sale, my FlyBoyz aviation related activity has dropped off recently. This can be seen in the relative lack of recent FlyBoyz posts. However, my control line flying buddy, FlyBoy Steve Dwyer has been doing his best to fill the void! I have received a new update from Steve on his efforts to restore his 50 year old control line ME109. Steve presents an excellent description of what is involved in restoring an old model to like new condition and his article is a real ‘how-to’ primer for anyone interested in modeling techniques. As can be seen in the photos he provided, Steve’s restoration effort was well worth it. The restored ME109 looks beautiful. I can’t wait to join Steve at a flying session where I can see the ME109 fly!
Here now is Steve’s latest report. Enjoy and be sure to leave any comments or questions you may have.
(Click on photos to zoom in on them)
ME109 Restoration Project
Restoration of the ME109 has progressed along very well over the past month resulting in my finally completing the project. Making repairs doesn’t take nearly as long as building a model from scratch. Regretfully, I have not been diligent about taking as many progress photos as I had planned, never the less, I’ll attempt to describe the repairs and modifications I made.
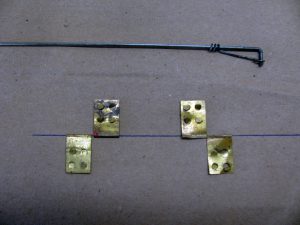
The condition of the 50 year old model was fair to poor depending on one’s perspective. The 48” wing was covered using doped natural silk with 1/16” balsa sheeting on the leading and trailing edges. The ribs were also made from 1/16” stock with 1/4” wide cap strips. The wing design is a “D Tube” configuration using 1/16” vertical grain balsa blocking between the upper and lower leading edge sheeting and each rib. The boxed wing design is exceptionally strong considering how light it is with no spars. The built up fuselage has 1/8” sides and bottom surfaces with a 1/16” rolled turtle deck on formers. The horizontal stabilizer and elevator are made from 1/8” balsa while the flaps are tapered from 1/4” material. Hinges on both elevator and flaps were the old style brass Perfect Brand using .032 music wire running the length of the control surface for pinning. Control push rods were made from 1/16” dia. wire bent 90 degrees at both control horns with a Perfect Keeper for security. A photo is attached showing both. The two control horns were homemade using 3/32” wire with soldered horns. The flap and elevator control surface hinges were secure and were not replaced. The bell crank used was a 3” Veco brand.
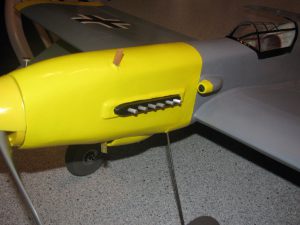
Most of the damage was in the tail and nose area, the sides of the fuselage supporting the horizontal stabilizer had broken (storage rash) and the inserted control horn wire had pulled thru of the elevator. The rudder was damaged also. Fuel had caused much deterioration to the front of the fuselage. All affected materials were replaced, the tank was removed and cleaned using Acetone, the tank dimensions were unique in size otherwise I would have replaced it; I plan to install an in-line filter. After fabric removal, I stripped all old dope using Acetone and using a fan and open window for good ventilation. I stiffened the rear fuselage using 1/32” bass wood and epoxy on each side and salvaged the elevator by installing a built up lamination of 1/16” balsa where the control wire is inserted into the elevator. Considerable time and effort was made re skinning the front of the fuselage and reshaping the contour to the spinner to improve the appearance. I used generous amounts of 30 minute epoxy and CA to rebuild most areas. Ambroid Fuel Proof Glue, one of the best at the time for model building, had dried out leaving most joints brittle and weak. I was careful to inspect and repair most of the joints at the exposed bulkheads as well as the wing structure with CA. The landing gear had loosened it was “J bolted” to the former behind the fuel tank. The “J bolts” were replaced with wire lacing and the former was epoxied to the tail ends of the hardwood engine mounts.
My goal here was to rebuild the model, improving its strength and appearance without compromising performance with added weight. My plan is to use the same Fox 35 engine I flew it with originally, performance as I recall was very good. There are many improved products available today such as carbon fiber push rods, nylon hinges, threaded adjustable clevis attachments instead of the Perfect spring keeper and of course MonoKote covering. I decided to retain as much of the “character” of my 50 year old model using the old style products and techniques.
After completing structural repairs, I coated the wing surfaces with two coats of Sig Clear Supercoat Butyrate sanding between coats and two coats of Sig Sanding Sealer on all fuselage and control surfaces. Admittedly, I was tempted to work the finish with more coats of Sanding Sealer at the penalty of added weight to achieve a glass like finish but refrained. Originally the plane was spray painted using Aerogloss Pactra fuel proof, which I recall was a very popular and excellent paint. I considered spraying it again but had recently achieved very good results using Sig Supercoat thinning it 3 to 1 for brushing. Thinned properly, all Sig paints flow nicely including the Sanding Sealer leaving no evidence it was brushed. I remembered to thoroughly vacuum all surfaces before applying the paint. I have read where other builders use lacquer thinner instead of Sig’s thinner with excellent results. I have mixed corn starch into clear dope thinned with Acetone for a sanding sealer but I wasn’t pleased with the results. The quick drying solvent does not flow as well as with Sig’s thinner and the finish requires more work to sand out. I think Sig uses a retarder in their thinner to slow the drying rate or some additive with a higher flash point. One more point, I learned to stay away from Sig Clear Nitrate Dope when applying the silk covering. I tried using it early on when getting back into modeling and discovered I had trouble applying the silk; Nitrate has a low shrink rate and is intended for smaller more fragile projects where the Butyrate with its high shrink rate would cause structural warping and distortion. Using Nitrate, I was unable to get the silk to shrink and tighten properly leaving winkles when dry.
The wing was covered with 5 mm natural silk purchased from Dharma Trading Company which is the most economical source I know of. I had recently tried 8 and 10 mm weight but was most satisfied with the stretching and shrinkage characteristics using the 5 mm. All silks are strong and tend to hold up better with mishaps than the tissue products. Silk is manufactured by weight or mm (momme) in China with 16 mm being the heaviest. Applying silk is extremely easy resulting in a much stronger covering than tissue or silk span, the only drawback of course installing any fabric covering is the odor from the dope and complaints from other members of the house.
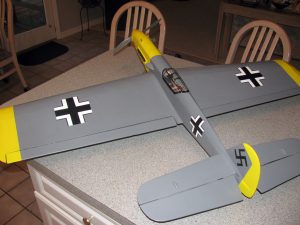
All emblems and markings on the wings and fuse were painted using stencils made with standard masking tape cut out on a sheet of aluminum, any hard glossy surface will work that will not reduce the adhesion of the tape. All stencils were edge sealed using clear dope to reduce bleed during painting. I have since discovered Frog Green painters tape is designed for sharp no bleed edges, next time I plan to try it, but I will always seal the edges as a precaution. Most Sig paints will finish to a satin like finish. To achieve a higher gloss finish in the past I have mixed clear gloss in with the color, clear gloss thinned can be applied or sprayed directly over the finished paint for a high gloss appearance. Sig also makes a flat paint to achieve the dull war bird look; the satin in my opinion was dull enough for this application. I created the wing root faring using 30 min epoxy mixed with corn starch waiting about 10 minutes for it to stiffen before applying and dragging it using a finger to achieve the consistent filled look. Micro balloons work well instead of the corn starch but I did not have any.
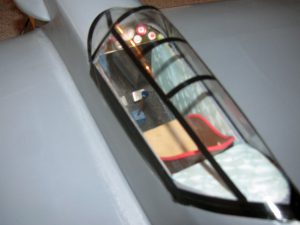
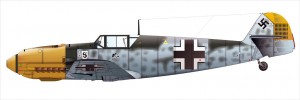
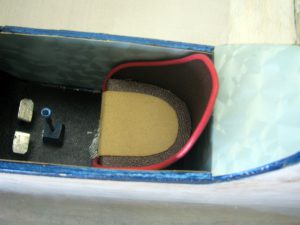
The yellow trimmed color scheme is patterned after Adolf Galland’s squadron, the canopy is made from clear plastic sheet I purchased at Sig using their canopy glue that dries clear once set, I also used Sig’s fuel proof Pin-striping for the frame look. The cockpit interior was left as originally built, everything including the seat was created from scratch using paper material I had acquired from a neighbor I recall who worked for a paper supply company. The rudder pedals and stick were scratch fabricated also. This model was built for stunt flying and not for scale display but on a lighter note there is some authenticity here, if you look very carefully (it’s really impossible to see) along the edge of the floor in the cockpit you will find a burned down stogie. According to information I’ve read, Galland was one of the first to have a cigar lighter installed in his plane. I’m sure he appreciated this especially during the long flights home after completing a successful sortie over the shores of Britain. Gotta love it!
I plan to send a photo of my completed project to the model designer whom I was successful in locating recently. Frank Baker, now in his late 80’s, flew his ME109 in stunt pattern competition; with a generous wing surface area to a light weight ratio and powered with a 35 size engine the model performed well. I’m sure Frank will appreciate seeing his 50 year old creation still being flown today. I’m interested in finding if there was a video made of the actual flying competition between Frank using his ME109 and Bob Aldrich flying his then newly designed Nobler, an icon in the control line model world today.
Well folks, restoring the ME109 has been on my list of to dos for a long time. I hope you have enjoyed going back with me with this project. I do not profess to be an expert model builder, I question if my skills even reach intermediate level when compared to some of the beauties the real experts build. And by far I don’t consider myself a writer but I enjoy old control line stuff and always feel the urge to share it with others. I would add that if reading this has brought you back to some earlier experiences triggering old memories and the passion you may have once had for control line modeling, then I encourage you to send your stories and photos in to the Blog. I’m sure others would be interested in your experiences as I would. I also want to thank Mike O’Neill, the Founder, Editor and Blog Administrator for giving me the opportunity to share these experiences with you. Mike has done a phenomenal job in developing the FlyBoyzBlog as can be seen from the world wide readership, keep up the good work Mike!
It’s now time to get the flying box cleaned out, get some fresh fuel and plan a day at the flying field.
The snow in upstate New York has finally melted away, it will only be a few weeks before we can reel out the lines and turn over those old model engines (especially the old timers that use castor oil). I think I’ll take some time off now, close down the shop and enjoy some flying. Until the next project, have a fun flying season.
Best Regards,
Steve
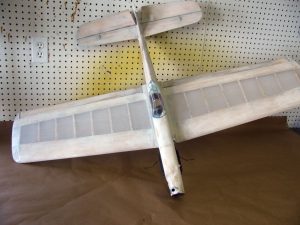
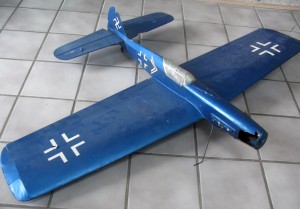
P.S. For those who may have missed it, here is a ‘Before’ photo of Steve’s ME109:


